DeFelsko manufactures a hand-held, non-destructive ultrasonic thickness gage that is ideal for measuring the thickness of aircraft windows during the window restoration process.

When evaluating the effects of wear and erosion on a substrate, the primary objective is to non-destructively measure its remaining thickness. Due to the safety considerations associated with aircraft inspections, rapid sampling and data logging may be required.
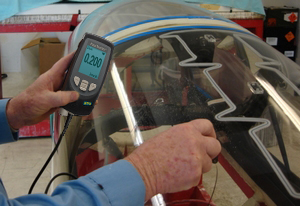
The ultrasonic PosiTector UTG C is ideal for non-destructive measurement of acrylic substrate thickness between 1 and 50 mm (0.04 and 2.00"). Figure 1 is an application photo of a repair technician using a PosiTector UTG C to measure the remaining substrate thickness of an aircraft window under repair. By measuring across the surface of the window, it is possible to identify areas that have experienced significant in-flight erosion or wear from the window restoration process.

Figure 1 - Measurement of Aircraft Windows
The PosiTector UTG C features several preprogrammed sound velocities for common substrates. When measuring the thickness of acrylic windows, the user may either select "plexiglass" from the gage menu, or for best accuracy, make a simple adjustment to a known sample thickness or sound velocity. The PosiTector UTG C can be adjusted to a broad range of sound velocities spanning from 0.0492 to 0.393 mils/µs (1250 to 10000 m/s).

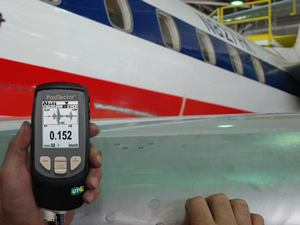
The PosiTector UTG C's preset Aluminum sound velocity is ideal for measuring the thickness of aluminum panels on aircraft wings.
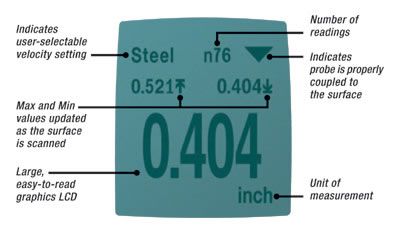
When multiple measurements are required, the Scan Mode feature of the instrument enables 20 readings per second to be taken while the coupled probe is dragged across the window surface. The result is a high-detail thickness map of the window. As shown in Figure 2, the Scan Mode of the instrument displays the total number of readings as well as the highest and lowest readings. Not only will this provide the user with a sampling of the thinnest and thickest readings attained from the substrate, but the readings can also be stored and downloaded to optional PosiSoft computer software by the instrument.

For current pricing or to order these instruments, please contact us by telephone (315) 393-4450, fax (315) 393-8471, or e-mail techsale@defelsko.com. If you require additional technical information or have questions relating to your particular application, we encourage you to take advantage of our years of experience in recommending the best gage for your application.
During normal operation of an aircraft, micro cracks form on the outside of passenger cabin windows due to commonly occurring elements such as dust, sand, pollution, airborne volcanic acid and de-icing compounds. Preventative maintenance programs that repair such micro cracks prior before they become visible prevent high repair and replacement costs.
Global Aero Services has patented a robotic computer driven system that is used for window restoration referred to as the Global CS1 Repair Machine. The CS1 attaches directly to the exterior surface of the aircraft with suction cups. The CS1 has four polishing heads impregnated with special formulas that through robotic pickups and controls are used to polish and remove micro cracks from windows. In approximately 15 minutes, the CS1 is capable of automatically completing a window repair while restoring viewing clarity for the passenger. As the CS1 begins work on the next window, an operator simply wipes the window clean of remaining residue with a light cleaner and soft cloth.
While the window restoration process can be repeated numerous times before exceeding manufacturer suggested tolerances, it is still necessary to monitor the remaining window thickness by measuring after each repair. Such safety inspections are critical in aeronautical applications due to the potential catastrophic events associated with a failure.
Considering that passenger planes may have over 200 windows per aircraft, and that maintenance of cabin windows is rated as the 3rd highest maintenance cost in the industry, a fast and affordable method of measuring window thickness is required. Unlike mechanical measurements, ultrasonic inspections can occur from one side of the window, while leaving it in place, lowering maintenance costs and aircraft downtime.
The Global CS1 operates on Boeing 727, 737, 747, 757, 767, 777; Airbus 300 through 321 series; Fokker 100; MD80 and MD90 Series; as well as DC-8 and Dash-8. Due to its universal nature, the PosiTector UTG can be used to measure restored window thickness on these or any such aircraft.