PosiTector Advanced instruments feature USB Keyboard mode (S/N 784000+). PosiTector Advanced instruments (S/N 864000+) and PosiTest AT-A (S/N 18624) feature Bluetooth Keyboard modes for sending measurements to a computer or smart device as they are taken.
Both modes communicate with your computer by emulating keyboard keystrokes. When connected in a keyboard mode,nstruments will be recognized as a simple USB or Bluetooth keyboard. Each reading is 'typed', followed by a carriage return (enter). This provides a simple way to capture readings as they are taken without any special software, drivers, or complex setup. Users can decide between the simplicity of the wired USB Keyboard mode and freedom of Bluetooth wireless connection.
These modes are ideal for use with your own quality control reports or pre-formatted spreadsheets. They can also be used to interface with Programmable Logic Controllers (PLCs) used for industrial automation.
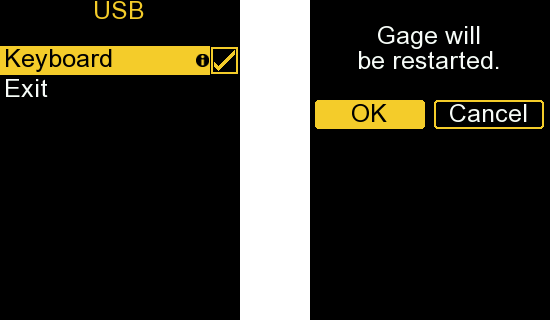
To enable USB Keyboard mode:
Note: The gage will restart and all other USB modes, such as USB Drive, will be disabled. Stored readings and settings are retained.

Once restarted, the PosiTector will be recognized as a USB keyboard device when connected to a computer. This mode is compatible with any software that accepts keystrokes.
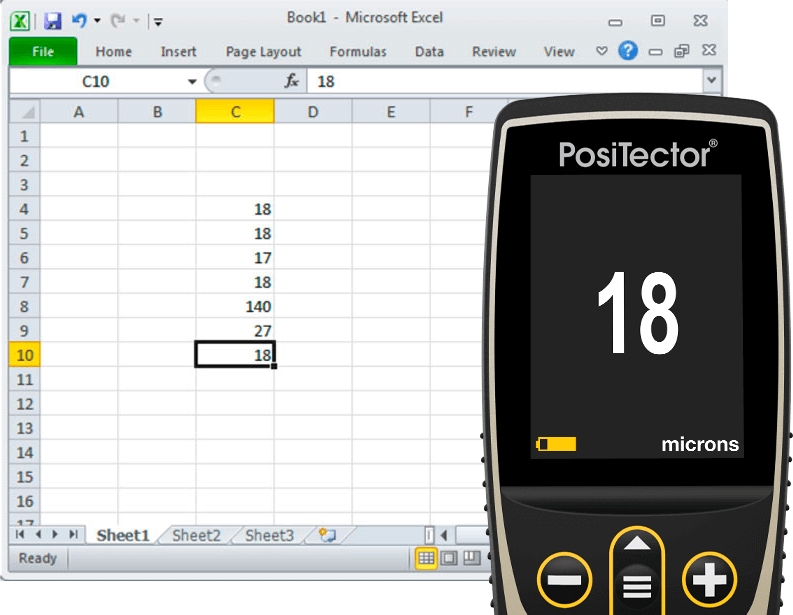
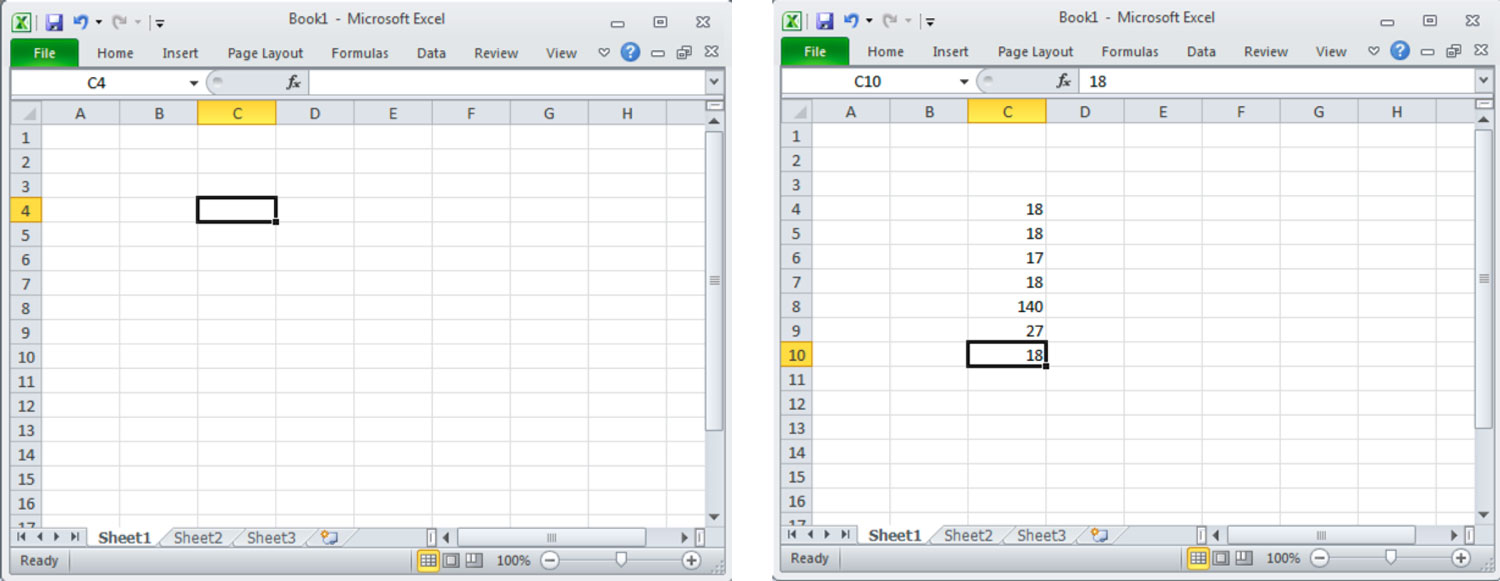
When a reading is taken, the numeric thickness value will be transferred followed by a carriage return (enter).
Format: Thickness <cr>
Note: Only the numeric thickness reading is transferred. The measurement unit (mils/microns/mm) is not transferred.
USB Keyboard Example:
Note: Any readings stored into the gage's memory while in USB Keyboard mode will not accessible for download to computer until USB Drive has been re-enabled with the Connect -> USB menu.
To disable USB Keyboard mode:
Note: The gage will restart. All other USB modes such as USB Drive will remain disabled. They can be re-enabled within the Connect -> USB menu.
Bluetooth Keyboard mode enables PosiTector Advanced instruments (gage body serial numbers 864000 and greater) to emulate a Bluetooth wireless keyboard when connected to a computer or mobile device. When connected, the PosiTector will be recognized as a simple Bluetooth keyboard and communicate measurements by emulating keystrokes.
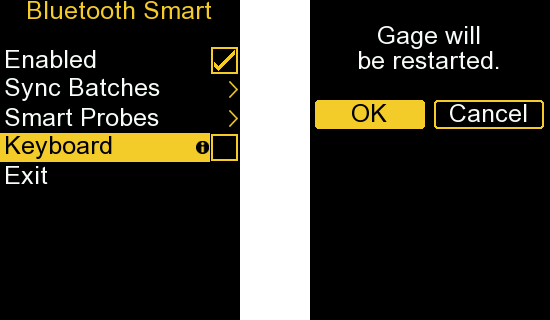
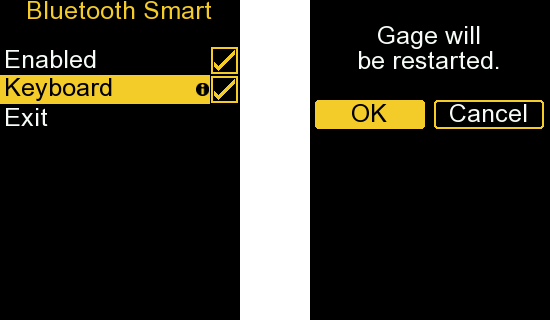
To enable Bluetooth Keyboard mode:
Note: The gage will restart and all other Bluetooth connections will be disabled. Stored readings and settings are retained.
Once restarted, the PosiTector will be recognized as a Bluetooth keyboard device when connected to a computer. This mode is compatible with any software that accepts keystrokes. Bluetooth pairing must be initiated via the computer's connection menu. When a reading is taken, the numeric reading value will be transferred followed by a carriage return (enter).
Format: Thickness <cr>
Note: Only the numeric thickness reading is transferred. The measurement unit (mils/microns/mm) is not transferred.
Bluetooth Keyboard Example:
To disable Bluetooth Keyboard mode:
Note: The gage will restart and all other Bluetooth connections will remain disabled. They can be re-enabled within the Connect -> Bluetooth Smart menu.
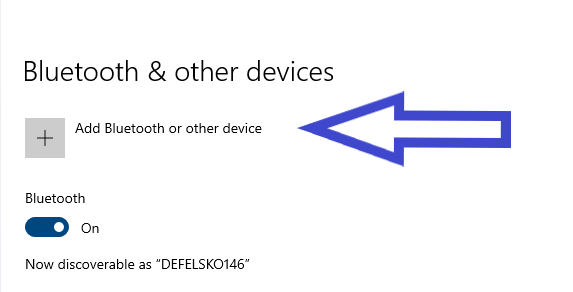
To connect a PosiTector Advanced gage body to a computer (the below example is for Windows 10) simply follow the following steps.
Select "Add Bluetooth or other device" from the settings menu in Windows 10.
Select "Bluetooth" in the "Add a device" menu.
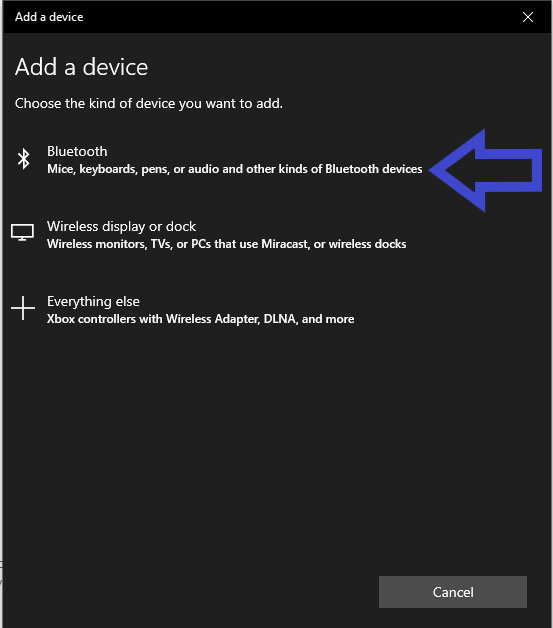
Select "PosiTector" to establish the Bluetooth connection.

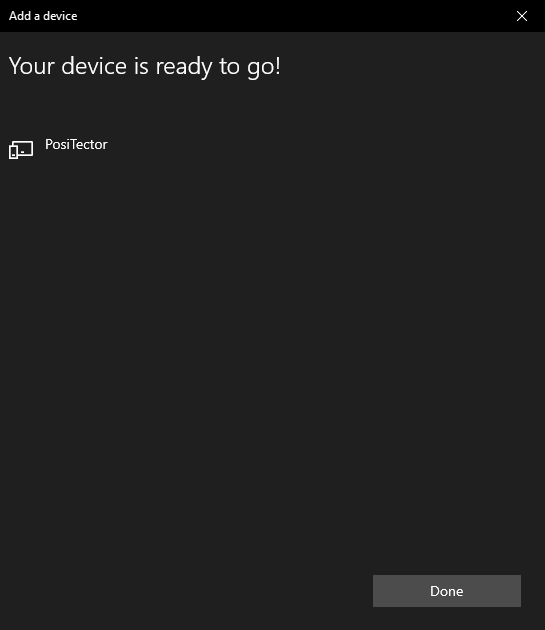
Once successfully connected, the below screen should appear. Your computer and PosiTector Advanced gage body are successfully connected.